


As we speak, I needed to reply a pair questions on embroidering on these three-dimensional felted hearts that I confirmed you final week.
The information under can apply to any related three-dimensional object. That is just about how I’m going about embroidering on any pre-felted shapes. In actual fact, I’ll present you some extra explorations of an analogous nature within the weeks to return! And share extra ideas alongside the way in which.
However for starters, these two ideas reply nearly all of questions that arrived in my inbox, so right here we go…
Tiger Tape
I obtained plenty of questions which can be variations of those three:
How do you mark your design traces on the felt? or How do you get your traces so straight? or How do you switch your sample onto the felt?
First, I don’t actually use a sample for stitching one thing this small. I persist with parts (traces or particular person stitches) that may be “free handed” as I’m going.
The hearts are simply round 1.5″ at their tallest level and 1.5″ at their widest level, in order that they aren’t giant.
Due to their small dimension, they’re not fairly the area for classy designs. Easy is greatest. And since the stitches and designs are easy, they’ll largely be “free handed” – as in, you don’t want a marked design to work them out.
Nevertheless, a straight guideline is useful, and if that line might be marked in evenly-spaced increments, even higher!
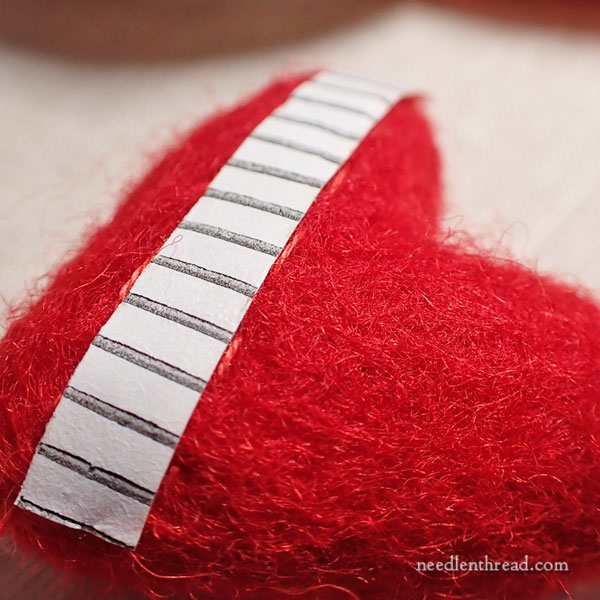
To wit, Tiger Tape. Tiger Tape (the sort bought within the quilting business) is a pre-marked, slim tape that gives a sewing guideline.
I put it the place I need it and I sew alongside the sting.
Generally, I’ll sew a collection of tips alongside the sting of the tape, utilizing a stitching thread that’s the identical shade because the felt, that I can simply cowl with my embroidery thread.
More often than not, although, I simply sew my embroidery stitches proper alongside the sting of the Tiger Tape, utilizing the marked increments to assist me create good, even stitches.
The tape is a bit cheesy in order that it stays in place, however not cheesy sufficient that it pulls the felt fibers all out of whack once you take away it. It really works nice for this type of challenge.
The place to Discover Tiger Tape
You’ll find Tiger Tape on-line although varied quilt outlets and the like. When you’ve got a neighborhood quilt store, examine there. It’s additionally obtainable on Amazon.
I like each the 9 and 12 1/4″ tape (which means 9 marking traces or 12 marking traces per inch, on tape that’s 1/4″ vast).
No Knots, No Entrance and Again
Some people requested about beginning and ending the threads, and if the again of the felted hears are just like the again of embroidered material, the place you see the backs of the stitches.
To start out a thread, I take the needle and embroidery thread into the form, wherever, rising within the neighborhood of the place I need to begin embroidering. I pull by gently, simply till the tail of the embroidery thread disappears inside the form.
Alternately, you may knot the tip of the thread and simply plan to clip the knot once you’re completed stitching, near the floor of the felt and pulling on the knotted finish, in order that the thread sinks into the form as soon as clipped.
However if you happen to pull your thread tail into the form gently, you don’t actually need a knot.

Then I flip the needle round and enter the form once more, proper in the identical gap the place the needle simply emerged, however popping out precisely the place I need to begin stitching.
I tug the thread a bit to get to sink it into the form, ensuring it may’t be seen.
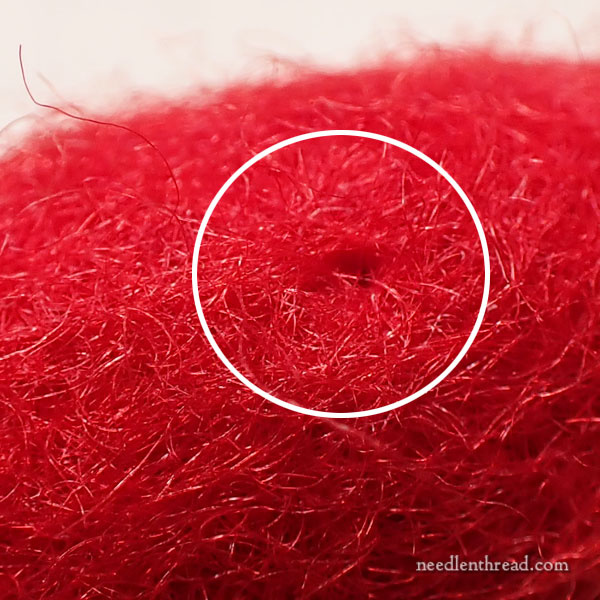
I would find yourself with a bit dimple, just like the one you see within the picture above.
To remove the dimple, I simply poke throughout it with the purpose of my needle and it disappears.
Stitching
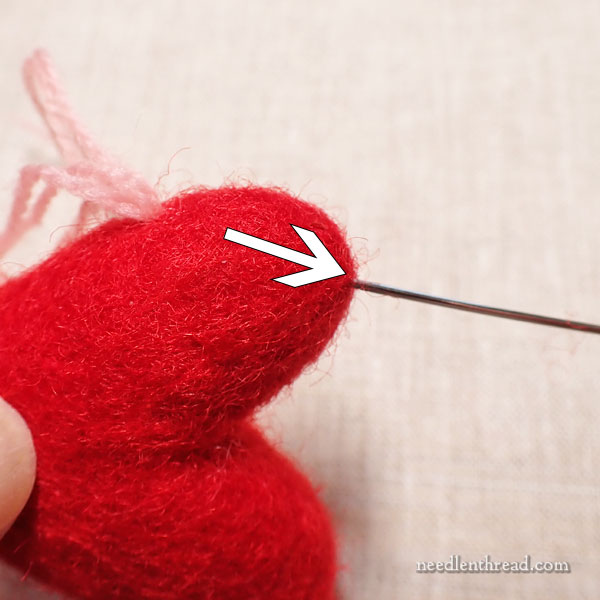
When stitching a 3-D form like this, the needle doesn’t go all the way in which to the again of the form with every sew. As an alternative, “scoop” the sew. Work from the entrance of the form and “scoop” into the form and out once more on the entrance.
That is the standard “stitching” technique of embroidery, the place you don’t stab by to the again. As an alternative, you “scoop” your material, poking into the material and out once more and pulling by all from the entrance of the work.
This motion is straightforward sufficient on line stitches, daisy stitches, and so forth. On knots like French knots and bullion knots, you simply must “scoop” between the final motion of the sew and the place you need to emerge for the subsequent sew – and also you might need to control the way in which you maintain the merchandise in an effort to maintain the sew in place whilst you pull by.
When you get the dangle of it, it’s actually very simple!
On felted objects, you don’t must scoop too deep – simply deep sufficient that the embroidery thread doesn’t present by the floor of the form.
On the hearts that I confirmed you final week, I sewed utterly across the shapes for many of them. I used the Tiger Tape to make a band across the form, the place I needed my design traces to be, and embroidered alongside the band round the back and front.
Extra to Come!
I’m engaged on another 3-D embroidered items right here and there, and I’ll be sharing these with you quickly.
For individuals who have requested for a supply for the felted hearts (and for another shapes), I plan to have a few of these obtainable for you within the not-too-distant future. They’re So Enjoyable!
Embroidery with Wool
In case you’re new to embroidery with wool and it’s one thing you’d wish to attempt, why not try my Wildflowers in Wool embroidery package?
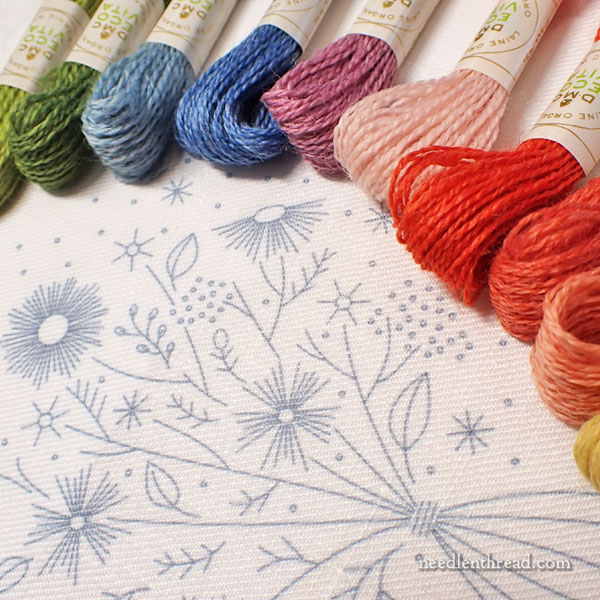
It’s excellent for novices! The package comprises full skeins of ten lovely colours of wool threads, which leaves you with loads of extra to make use of on different initiatives, too.
It’s a really satisfying challenge to sew – and excellent for beating the winter blues!
You’ll be able to learn all about Wildflowers in Wool right here.
Keep Heat!
Out right here within the Midwest, we’re having a bit chilly snap (under zero temps – as little as -20 F! – and highs within the day time only a diploma or two above 0 F). It’s an ideal time to cozy as much as the fireside and get some stitching in!
Or, in my case… the area heater.
Spring is simply across the nook, although.
I can really feel it in my bones.
(Hardy Har Har.)


")


